
Modern digital audio is mathematically perfect, which is precisely why it often sounds sterile. When tracking into a modern DAW at 24-bit resolution, you capture exact transients and endless high frequencies without any natural compression. Tape emulation and saturation exist to artificially reconstruct the beneficial flaws of analog recording hardware.
Many producers simply throw a tape plugin on the master bus and hope for warmth. This approach usually destroys the low-end definition and masks the critical midrange detail. Mastering tape saturation requires a surgical understanding of harmonic distortion, bias settings, and tape speed mechanics. This guide breaks down exactly how to apply these concepts across individual tracks, instrument groups, and the main mix bus.
The Mechanics of Magnetic Tape
Before applying any tape emulation, you must understand the physics it attempts to recreate. Analog tape recording involves magnetizing chemical particles on a plastic strip. This physical process cannot capture extreme transient spikes perfectly, and it gradually loses high-frequency energy as the magnetic head degrades or the tape speed decreases.
These limitations are not bugs, they are features. The inability to reproduce sudden loud peaks results in natural, un-pumped dynamic compression. The gradual loss of high-end energy results in a smoother, warmer frequency response that the human ear finds pleasing.
Tape Speed and Frequency Response
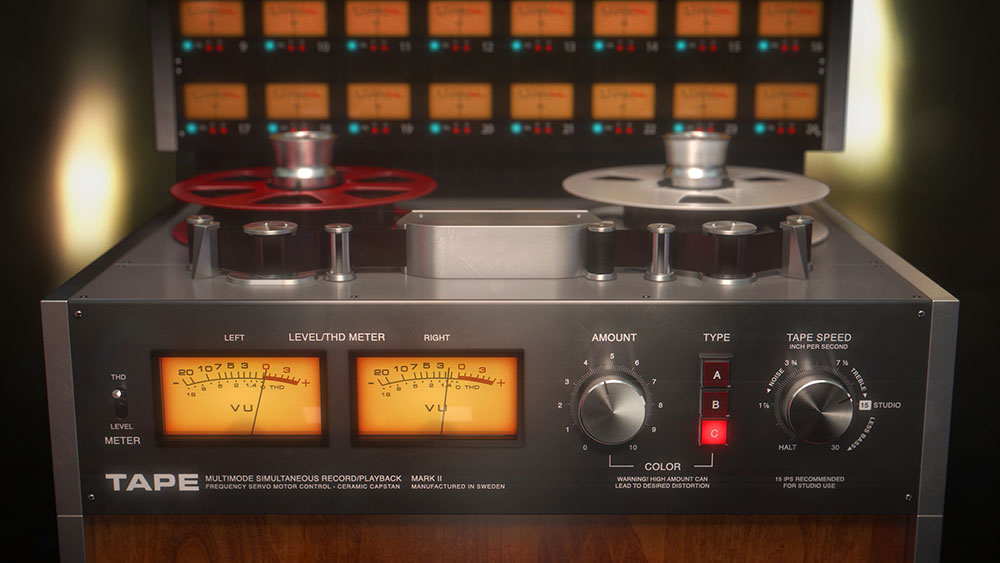
The most critical parameter on any tape machine is the tracking speed, measured in inches per second (ips). The physical speed of the tape dictates both the frequency response and the noise floor of the recording.
A speed of 30 ips provides the highest fidelity, offering extended high-frequency response and the lowest noise floor. This speed is ideal for pristine acoustic recordings or mastering applications where detail is paramount. However, 30 ips suffers from a phenomenon known as "head bump," which causes a subtle roll-off in the extreme low bass frequencies.
Slower Speeds for Thickness
A speed of 15 ips is the industry standard for rock and pop tracking. It offers a slightly reduced high-frequency response, which naturally tames harsh cymbals and brittle vocals. Crucially, 15 ips provides a massive, thick low-end bump that makes kick drums and bass guitars sound larger than life.
Dropping down to 7.5 ips severely restricts the high-frequency extension and increases the noise floor dramatically. While inappropriate for modern mastering, this speed is perfect for lo-fi hip-hop drum loops or for mangling background vocal textures. It forces the audio specifically into the midrange.
Bias and High-Frequency Distortion
Bias is an ultrasonic signal mixed into the audio before it hits the tape head. It was originally designed to reduce the distortion inherent in the magnetic recording process. In the digital realm, manipulating the bias setting is a powerful tool for controlling high-frequency aggression.
Over-biasing a tape emulation plugin will compress the high frequencies and create a darker, smoother tone. This is excellent for taming harsh, close-mic'd violins or sibilant lead vocals. Under-biasing increases the high-frequency distortion, adding a raspy, aggressive bite that helps snare drums and distorted guitars cut through a dense mix.
Applying Tape Emulation on Individual Tracks
The true power of tape emulation lies in cumulative application. A subtle instance on every single track in a session will yield a much more convincing analog sound than one heavy instance on the master bus. This mimics the historical process of recording individual instruments to a multitrack tape machine before mixing.
However, you must be careful not to build up too much noise floor or low-mid mud. The friction point here is the compounding effect of low-end resonance.
Taming the Drum Bus
Drums are the largest beneficiaries of tape compression. Acoustic drum recordings contain massive transient spikes that can easily eat up all the headroom in a digital mix. A tape plugin naturally rounds off these peaks without the aggressive pumping artifacts associated with standard VCA compressors.
Insert your tape emulator on the drum bus and drive the input gain until the kick and snare just begin to flatten out visually on the plugin's meters. You should hear the shells of the drums getting thicker while the sharp "click" of the attack softens. Use a 15 ips setting to maximize the low-end weight of the kick drum.
Smoothing Vocals and Guitars
Lead vocals often suffer from harsh sibilance and brittle high frequencies when recorded with modern condenser microphones. A tape plugin running at 15 ips or 30 ips can act as a sophisticated de-esser. The natural tape compression grabs the harsh "S" and "T" sounds and smears them slightly, making them sit more comfortably in the mix.
For distorted electric guitars, tape emulation is essential for removing what engineers call "digital fizz." The 15 ips tape speed acts as a gentle, musical low-pass filter. It shaves off the irritating frequencies above 8kHz that compete with the cymbals and lead vocals, allowing the midrange power of the guitar to dominate.
Saturation Strategies for Electronic Music
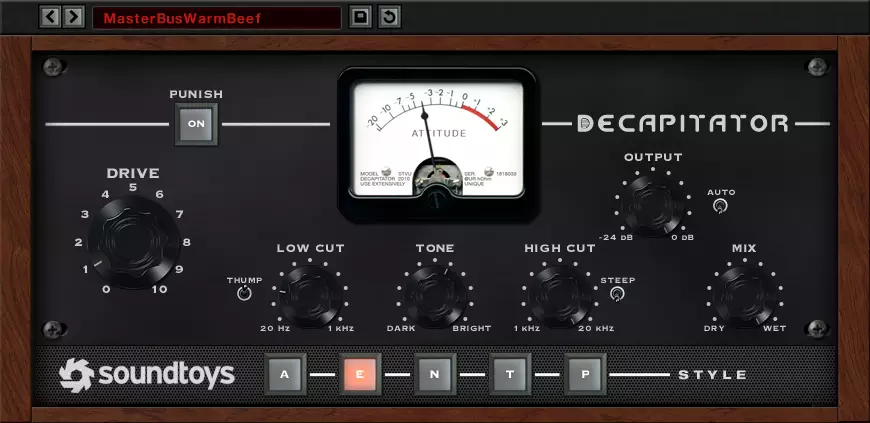
While tape emulation focuses on subtle harmonic distortion and compression, dedicated saturation plugins offer aggressive tonal destruction. In electronic music production, saturation is not just a mixing tool, it is a fundamental sound design technique.
Clean sine wave sub-basses and pristine digital synthesizers often struggle to translate on small speakers. Saturation generates upper harmonics that trick the ear into perceiving the fundamental frequencies, even when those frequencies cannot be physically reproduced by the playback system.
Exciting the Sub Bass
A pure 40Hz sine wave is completely inaudible on a smartphone speaker. If your entire bassline relies on this frequency, the track will sound empty on consumer devices. You must add saturation to generate audible harmonics at 80Hz, 160Hz, and 320Hz.
Use a dedicated saturation plugin on your sub-bass track. Drive the virtual circuit until you hear a raspy, buzzy overtone developing above the fundamental pitch. Then, use a low-pass filter to restrict this buzz to the low-midrange, preventing it from interfering with the lead synths or vocals.
Parallel Saturation for Percussion
Electronic drum samples are often pre-processed to the point of being lifeless perfectly sterile blocks of audio. To inject aggression and movement back into these samples, use parallel saturation.
Send your entire drum bus to an auxiliary track. Insert a heavy saturation or distortion plugin on this aux and completely obliterate the signal. EQ this distorted track to remove the extreme lows and extreme highs, leaving only a nasty, aggressive midrange crunch. Blend this crunch subtly underneath the clean drum bus to add instant perceived loudness and grit without sacrificing the punch of the original transients.
The Master Bus and Final Mixdown
Applying tape emulation to the master bus is the final step in the analog workflow. This process provides the legendary "glue" that binds disparate tracks together into a cohesive, finished record. However, this is also where most producers destroy their mixes.
Applying too much input drive to the master bus tape plugin will crush the kick drum transients and turn the entire mix into a muddy, pumping mess. Restraint is the only way to succeed here.
Setting Up the Master Tape
Insert a high-quality, mastering-grade tape emulation plugin as the very first insert on your master bus, before any EQ or mix bus compression. Set the tape speed to 30 ips to maintain maximum high-frequency clarity and transient detail.
Adjust the input gain so the plugin is only doing 1dB to 2dB of transient reduction on the loudest peaks of the song. You should not hear obvious distortion or pumping. The effect should simply make the mix sound finished, cohesive, and slightly more solid in the low-midrange. If you bypass the plugin, the mix should suddenly sound slightly flat and disjointed.
By understanding the mechanics of tape speed, bias, and harmonic generation, you can transform a clinical digital tracking session into a massive, warm analog-style production. It requires patience and surgical application, but the results are undeniably powerful.
Related Articles
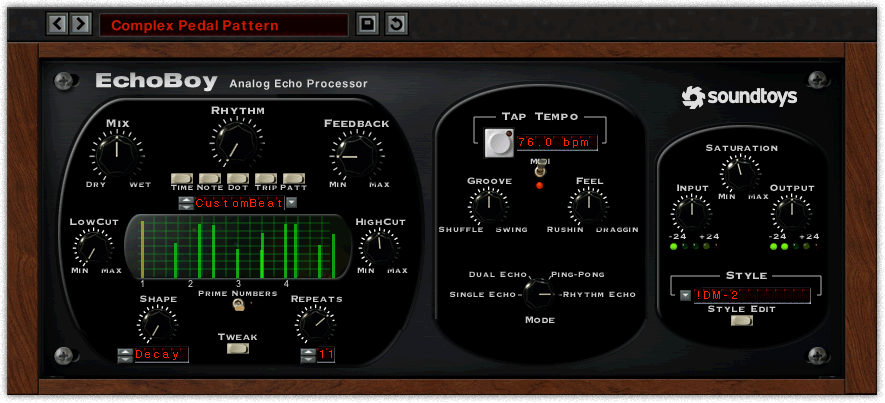
The 7 Best Tape Delay Plugins for Authentic Analog Echo
Discover the 7 best tape delay plugins for analog warmth, vintage degradation, and dub-style echo. Validated in real mixing sessions.

7 Best Tape Emulator Plugins for Analog Warmth
A comprehensive guide to the best tape emulator plugins for adding authentic analog warmth, saturation, and character to your digital mixes.
The 7 Best Saturation Plugins For Analog Warmth (2026)
A blunt review of the 7 best saturation plugins for analog warmth in 2026. Because digital sterility destroys good tracks.

Henry Foster
Henry is a mixing engineer with a background in broadcast and post-production. He obsesses over signal flow, gain staging, and the subtle coloration of analog-modeled plugins. His reviews focus on technical precision, CPU efficiency, and UI workflow.