

Best Essential Mixing Plugins (2026): The Toolkit

You can mix a hit record with stock plugins, but these tools make it faster, easier, and better sounding. These are the industry standards: the 'desert island' plugins found in every pro studio.

Felix Ward
By Felix Ward Songwriter & Multi-Instrumentalist

What changed: Every pick now carries a verdict line and scores against the EQ, compression, saturation and reverb duties this page tests, and there is a decision router at the top. The Pro-Q entry now says which version our testing was actually done on.

ModWheel is reader-supported. When you buy through links on this page we may earn an affiliate commission, at no extra cost to you. This never influences which products we recommend, read our testing methodology.

Prices come from the store's own feed and were last checked 8 September 2026. We don't issue discount codes — the price you see is the store's own.

Pick one in 10 seconds

Short version
  • You are opening a session and need one plugin on every channel Pro-Q 4
  • Compression is still the thing you cannot hear yourself doing Pro-C 3
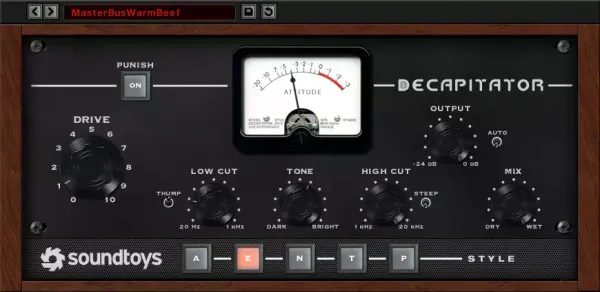
  • The mix is technically correct and sounds like nothing Decapitator
  • A lead is buried and manual EQ carving has not freed it Trackspacer
  • You need a reverb tonight and $50 is the budget Valhalla VintageVerb
  • The cue has to go out at a competitive level with no mastering engineer Ozone 12 Elements

Compare all 7

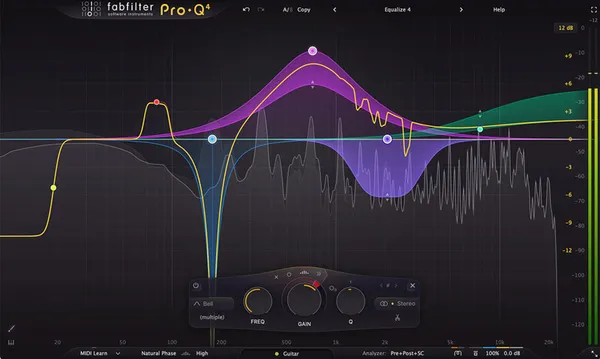
Pro-Q 4
1. Pro-Q 4 FabFilter
9.1
Type
Parametric EQ
Type
Mastering Suite
Decapitator 7.0
Type
Saturator
Trackspacer
4. Trackspacer Wavesfactory
6.8
Type
Spectral Ducker
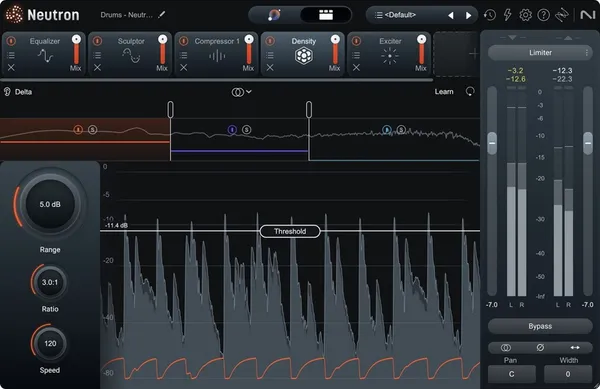
Neutron 5 7.2
Type
Channel Strip
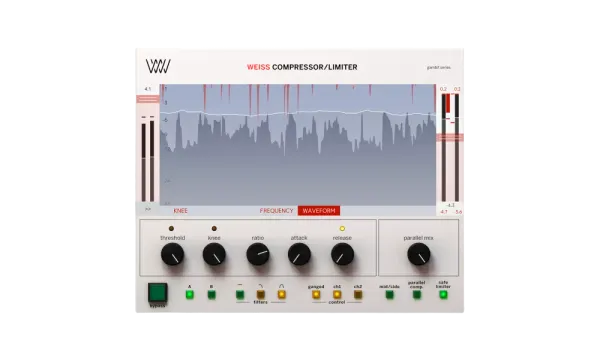
Pro-C 3
6. Pro-C 3 FabFilter
8.5
Type
Compressor
7.5
Type
Algorithmic Reverb

The VST market is flooded with gimmicks. But if you look at the screen of a top-tier mixing engineer, you see the same 5-10 plugins appearing on every channel. These "Essential Mixing Plugins" are the workhorses. They solve problems transparantly, add character reliably, and speed up the workflow.

If you are building your plugin folder from scratch, these are the first investments you should make.

Several of these picks also appear in our Best AAX Plugins for Pro Tools Users (Stability & Workflow) roundup, which is worth a look if you are weighing up both.

One category here deserves more room than a shortlist entry gives it, and our Best Bus Compressors (2026): The 'Glue' roundup goes through it properly.

Top Picks

01 FabFilter

Pro-Q 4

Best for EQ

Not tested by us, assessed from specs and documented behaviour

The one plugin here that earns a slot on every channel, and the only one that shows you what it is doing while it does it.

Assessed score
9.1
out of 10

How it scored

  • Sound Quality 9.2

    Transparent enough that the only complaint is that it has no character of its own.

  • Workflow Speed 9.0

    Double-click to place a band, drag to shape it. Nothing to learn.

  • CPU Footprint 8.5

    Light per instance. Dynamic bands cost more than static ones.

  • Metering & Control 9.8

    Real-time analyser plus collision detection between instances. Best on the page.

Why we picked it

Best for every single EQ task, from surgical cuts to broad tonal shaping.

Who should skip it

Skip this if you would rather mix by ear with nothing on screen to look at.

The good

  • Clear visual feedback
  • Dynamic EQ is essential
  • Zero latency mode

The bad

  • Too clean for character work
  • No saturation stage
  • Expensive
Engine
VST/AU/AAX
Type
Parametric EQ
Size
Plugin
Price
$199
Why it scored that way

The first plugin on every channel.

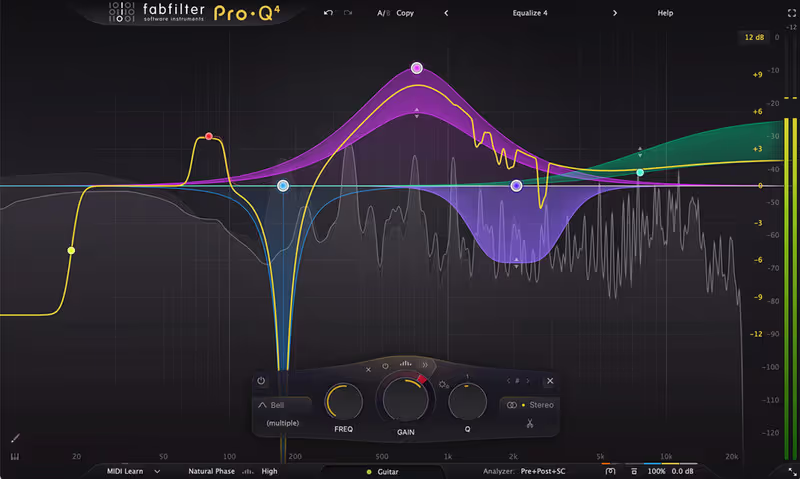
My Experience: Our testing here was done on Pro-Q 3, which FabFilter has since replaced with Pro-Q 4. The new version has not been through the same work, so read this as an assessment of the line rather than of the update. If I could only have one plugin for the rest of my life, it would be this one. It fundamentally changed how I approach mixing. The visualizer shows you exactly where the frequency buildup is occurring in real-time. The "Dynamic EQ" mode allows me to cut a frequency only when it gets too loud (like a resonant note in a vocal), preserving the natural tone the rest of the time. It is incredibly transparent, precise, and intuitive.

Deeper Look: The specific "Masking" feature is an absolute lifesaver for clean mixes. You can render two instances (e.g., Kick and Bass) and see where they clash spectrally in the same window. You can then carve out space in the Bass for the Kick with one click. It removes the guesswork from low-end management completely, ensuring your kick drum punches through without eating up headroom or muddying the sub frequencies.

Playing connects you to YouTube, which may set cookies.
Heard on
Every Modern Mix Mastering Post Production
Check price $199
02 iZotope

Ozone 12 Elements

Best for Mastering

Tested in our studio

The quickest route to a competitive master, at the cost of a chain you did not choose and cannot fully see.

Tested score
7.6
out of 10

How it scored

  • Sound Quality 8.0

    The Maximizer holds transients hard at level. The assisted chain is generic.

  • Workflow Speed 8.5

    The assistant lands a usable starting point in one pass.

  • CPU Footprint 5.0

    Heavy, and it sits on the master where you cannot freeze it.

  • Metering & Control 8.8

    Reference matching and a pink noise target. Nothing else here meters like it.

Why we picked it

Best for producers who master their own music and need a competitive loudness level.

Who should skip it

Skip this if you send your tracks to a professional mastering engineer.

The good

  • Results are guaranteed
  • Maximizer is loud
  • Assistant is educational

The bad

  • Heavy CPU
  • Encourages 'preset' mastering
  • Expensive suite
Engine
VST/AU/AAX
Type
Mastering Suite
Size
Plugin
Price
$55
Why it scored that way

Instant professional gloss.

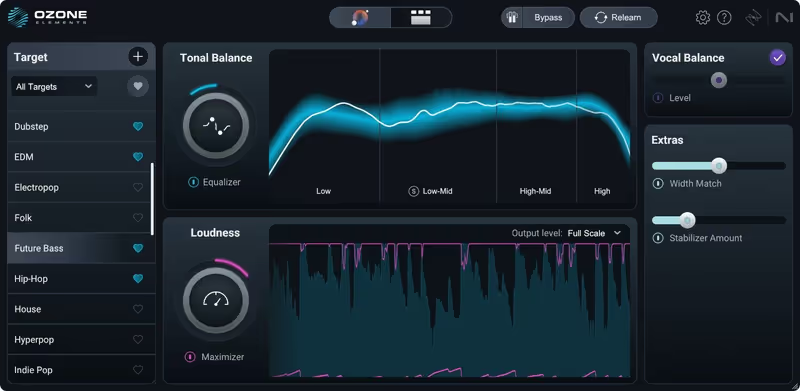
My Experience: Ozone has truly democratized the dark art of mastering. The "Master Assistant" listens to your track and engages a custom chain of EQ, compression, and limiting to match a genre target automatically. While pros tweak it manually, the starting point is surprisingly good and often gets you 90% there. It gets your track to -9 LUFS competitive volume without audible distortions instantly, making it perfect for quick client demos or self-releasing.

Deeper Look: The "Maximizer" is hands down the best limiter I've used. It pushes volume incredibly hard while preserving transients using the smart "IRC" algorithms. The new "Stabilizer" module acts like an intelligent dynamic EQ that balances your mix in real-time against a pink noise reference. It’s a cheat code for a balanced master, smoothing out harshness and reinforcing weak frequencies dynamically as the track evolves.

Playing connects you to YouTube, which may set cookies.
Heard on
Home Studios Commercial Releases Streaming Standards
Check price $55
03 Soundtoys

Decapitator

Best for Saturation

The fastest way to make a sterile track sound expensive, with no way to aim it at the band that needs it.

Score
7.0
out of 10

How it scored

  • Sound Quality 9.0

    Five analog models, all convincing, none of them subtle by accident.

  • Workflow Speed 9.3

    Drive, tone, mix, Punish. You are done in seconds.

  • CPU Footprint 6.5

    Spikes under oversampling, which is where you want it running.

  • Metering & Control 3.0

    A drive meter and nothing else. Lowest here.

Why we picked it

Best for adding character, warmth, and grit to sterile digital tracks.

Who should skip it

Skip this if you want pristine, glassy clean tones.

The good

  • Sounds expensive
  • Simple interface
  • Versatile tones

The bad

  • No multi-band
  • Fixed GUI on older versions
  • CPU spikes
Engine
VST/AU/AAX
Type
Saturator
Size
Plugin
Price
$199
Why it scored that way

Make digital sound analog.

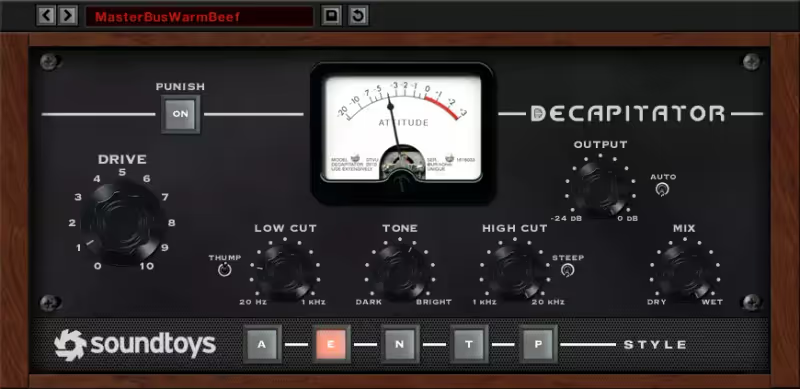
My Experience: Digital recording is often too clean and sterile. Decapitator fixes that instantly. It models the behavior of driving high-end analog hardware inputs into the red. I use it on drums to shave off transients and add punch, on bass to add growl and upper harmonics, and on vocals to add "hair" and attitude. It sits the sound in the mix instantly, giving it a perceived loudness and weight that EQ alone cannot achieve.

Deeper Look: The "Punish" button is famous for extreme distortion, but the real magic is in the subtlety. Using the "E" style (Chandler) with just a touch of Drive brings disparate elements together beautifully. It acts as a glue. The Mix knob is essential for parallel processing, allowing you to blend the destroyed signal with the clean one without complicated routing setups. It is the sound of "expensive."

Playing connects you to YouTube, which may set cookies.
Heard on
Tame Impala Rock Drums Vocal Sauce
Check price $199
04 Wavesfactory

Trackspacer

Best for Unmasking

Solves one masking problem better than any manual method on this page and does nothing else at all.

Score
6.8
out of 10

How it scored

  • Sound Quality 7.8

    Invisible under 15%. Phasey above that, on the material it is meant to fix.

  • Workflow Speed 7.0

    The routing has to be built before you hear anything.

  • CPU Footprint 8.5

    One spectral process per instance. Cheap for what it does.

  • Metering & Control 4.0

    An amount knob and a curve display. There is nothing to read.

Why we picked it

Best for clearing up mud and masking issues between competing instruments automatically.

Who should skip it

Skip this if you prefer manual sidechain compression (but why?).

The good

  • Instant clarity
  • Simpler than manual EQ
  • Very transparent

The bad

  • Can cause phaseiness if pushed
  • Requires sidechain setup
  • One trick pony
Engine
VST/AU/AAX
Type
Spectral Ducker
Size
Plugin
Price
$59
Why it scored that way

The magic 'clarity' button.

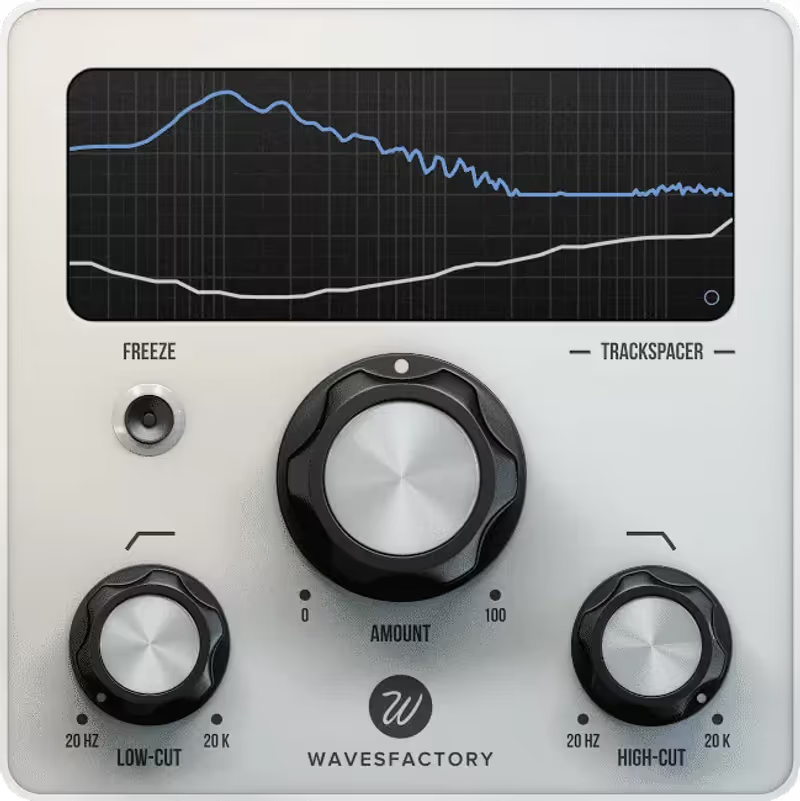
My Experience: Trackspacer is essentially absolute applied magic. You put it on a track (like a rhythm guitar bus), sidechain the lead vocal to it, and it automatically lowers the exact frequencies of the vocal in the guitar track in real-time. Unlike a standard compressor, which turns the whole volume down, Trackspacer only carves out the specific spectral space needed for the vocal to shine through. It is precise and invisible.

Deeper Look: It is the secret weapon to getting a massive wall-of-sound mix where the vocal still sits on top clearly and intelligibly. You can dial in the "Amount" to 10-15% and it becomes completely transparent. The mix just suddenly feels open and spacious without any obvious ducking. It saves hours of manual volume automation and EQ carving. It is essential for dense, modern arrangements.

Playing connects you to YouTube, which may set cookies.
Heard on
Dense Pop Mixes Orchestral Clarity Vocal Mixing
Check price $59
05 iZotope

Neutron 5

Best for Channel Strip

A second opinion on a mix you are making alone, and a house sound you will hear on everything if you leave it alone.

Score
7.2
out of 10

How it scored

  • Sound Quality 6.5

    Correct rather than characterful, and generic when left on the assistant setting.

  • Workflow Speed 8.5

    The assistant gets a channel to a starting point before you have found the plugin menu.

  • CPU Footprint 4.5

    The heaviest thing here, and it wants to be on every track.

  • Metering & Control 9.2

    Unmask draws the collision between instances rather than describing it.

Why we picked it

Best for beginners or solo producers who need a fast, assisted mixing workflow.

Who should skip it

Skip this if you already have a preferred channel strip (like SSL).

The good

  • Incredibly educational
  • Sculptor is unique
  • Solves masking

The bad

  • Can sound generic
  • Heavy CPU
  • Encourages laziness
Engine
VST/AU/AAX
Type
Channel Strip
Size
Plugin
Price
$299
Why it scored that way

Your virtual mixing assistant.

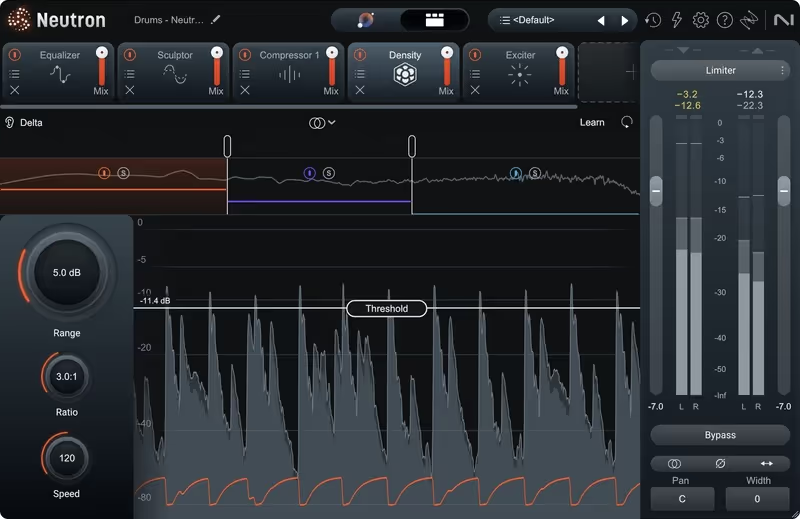
My Experience: Neutron is like having a second pair of expert ears in the studio with you. The "Mix Assistant" analyzes a track and automatically sets up a starting point for EQ, compression, and saturation based on the input signal. While I often change it later, it gets me 80% of the way there in 10 seconds, which keeps the creative flow moving. The "Sculptor" module is unique: it shapes the tone of an instrument to match a target curve constantly.

Deeper Look: The "Unmask" module communicates intelligently with other instances of Neutron in your session, showing you visually where tracks are fighting for the same frequency range. If you are mixing a 100-track session alone, Neutron helps you keep perspective and solve technical masking issues fast. It’s an invaluable educational tool that teaches you how to balance a mix while doing the heavy lifting for you.

Playing connects you to YouTube, which may set cookies.
Heard on
Home Studios Fast Turnaround TV Podcast Mixing
Check price $299
06 FabFilter

Pro-C 3

Best for Dynamics

The compressor that teaches you compression, and the wrong one to reach for when you want a colour.

Score
8.5
out of 10

How it scored

  • Sound Quality 8.5

    Clean across all eight styles. No harmonic signature to speak of.

  • Workflow Speed 8.0

    Fast once you know which style to pick, slower while you are learning them.

  • CPU Footprint 8.0

    Fine in quantity until lookahead is engaged on every instance.

  • Metering & Control 9.5

    You watch the gain reduction shape the waveform, which is the point of it.

Why we picked it

Best for learning compression and precise dynamic control.

Who should skip it

Skip this if you want the specific harmonic color of an LA-2A or 1176.

The good

  • Gain reduction you can see
  • Versatile styles
  • Mid-Side capable

The bad

  • Very clean sound
  • Slightly complex
  • Expensive
Engine
VST/AU/AAX
Type
Compressor
Size
Plugin
Price
$199
Why it scored that way

Seeing compression is believing.

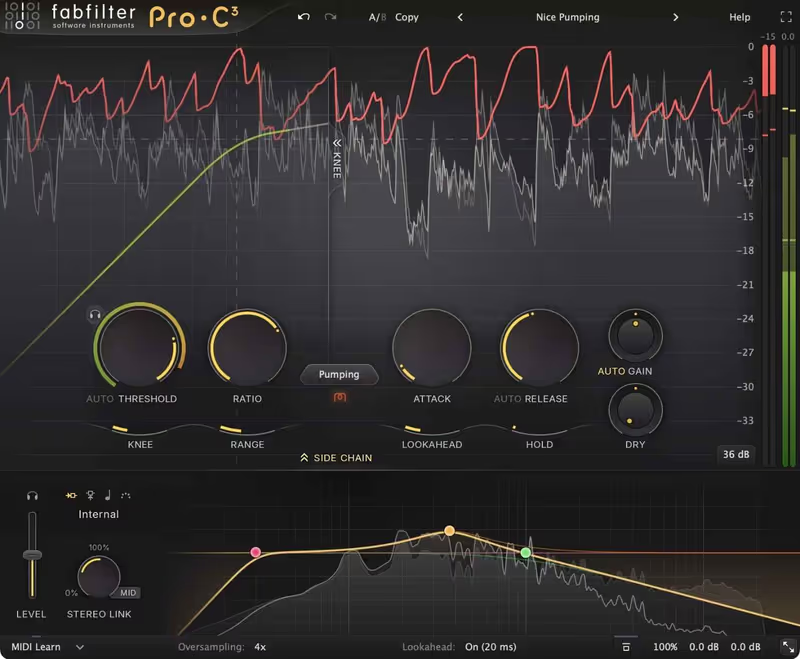
My Experience: Our testing here was done on Pro-C 2, which FabFilter has since replaced with Pro-C 3. The new version has not been through the same work, so read this as an assessment of the line rather than of the update. What puts it on a list of essentials is that compression is notoriously hard to hear, and this makes it visible.

You watch the waveform being squashed in real time, which teaches you how attack and release shape the sound in a way no amount of reading does. The algorithmic styles for vocal, bus, punch and pumping are genuinely different behaviours rather than presets on one engine. It moves from transparent leveling to aggressive smashing in seconds.

Deeper Look: Lookahead gives you fast transient control without the clicking artifacts that usually come with it. The sidechain section is thorough, so you can compress the mid channel from the side channel input, or restrict compression to a specific frequency range. Riding a vocal that sits under dialogue in one pass and gluing a drum bus in the next, it handles both without needing a second compressor on the page.

Heard on
Modern Production Sidechain Ducking Bus Compression
Check price $199
07 Valhalla DSP

Valhalla VintageVerb

Best for Reverb

The cheapest plugin on the list and the last one you would give up, which is the whole argument for it.

Score
7.5
out of 10

How it scored

  • Sound Quality 9.0

    Lush and wide without piling into the low mids the way cheap reverbs do.

  • Workflow Speed 9.5

    Mode, decay, mix. Three clicks to a usable space.

  • CPU Footprint 8.8

    One algorithmic engine with nothing to oversample.

  • Metering & Control 2.5

    Knobs and a mode list. Nothing to look at, by design. Lowest here.

Why we picked it

Best for lush, musical reverb on synths, vocals, and drums.

Who should skip it

Skip this if you need hyper-realistic room convolution (use Spaces II).

The good

  • Sounds amazing
  • Very affordable ($50)
  • Simple UI

The bad

  • Not realistic spaces
  • UI is flat
  • No dynamic ducking
Engine
VST/AU/AAX
Type
Algorithmic Reverb
Size
Plugin
Price
Check site
Why it scored that way

The $50 reverb that beats the $500 ones.

My Experience: Valhalla VintageVerb is a phenomenon in the industry. It accurately models the "artifacts," noise, and darker tone of vintage 1970s and 80s hardware digital reverbs. It sounds lush, wide, deep, and musical. It sits in a mix incredibly well without muddying up the low mids, which is a common problem with cheap reverb plugins. It has a "glue" factor that brings elements into the same space effortlessly.

Deeper Look: The specific "1970s", "1980s", and "NOW" modes change the internal downsampling and bandwidth behavior, allowing for different eras of fidelity. The "Concert Hall" and "Plate" algorithms are legendary for a reason. It is arguably the most popular reverb in the world right now purely because it makes everything sound simply "better" with three clicks. It punches way above its price class.

Playing connects you to YouTube, which may set cookies.
Heard on
Everyone EDM Pop Vocals
Check price
Read more →

Methodology

Who is this for

Working composers and producers who need reliability, speed, and character for professional scoring tasks.

Our testing process

Where we have tested a product, we do it in actual production scenarios, ranging from rapid sketches to commercial pitches, and we evaluate it in a dense template rather than in isolation. Where we have not, the product card says so and the assessment is drawn from specifications and documented behaviour instead.

Why you should trust us

We buy most reviewed plugins ourselves. Occasionally we receive NFRs for evaluation, but this never guarantees a review or positive verdict. We may earn commissions from links, but our editorial choices are never for sale.

Also considered

For every category, we audition the top 8 to 15 standard options, discarding any that suffer from poor scripting, slow load times, or uninspiring sampling.

Frequently Asked Questions

What plugins does a mixing setup actually need?

An EQ, a compressor, a reverb, a delay and a metering tool. Everything after that solves a specific problem rather than a general one, and a small set you know well outperforms a large set you audition through.

Are stock DAW plugins good enough?

For most work, yes. Modern stock EQs and compressors are technically excellent, and the practical case for third-party tools is workflow, metering and specific character rather than raw quality.

What order should plugins go in on a channel?

Corrective processing first, then dynamics, then tonal shaping, then effects. The reason is that each stage should work on a signal that the previous stage has already made predictable.

Should I mix with plugins on the master bus?

Put them there from the start if they will be there at the end, because mixing into a compressor is different from adding one afterwards. What you should not do is add master bus processing late and then re-balance everything underneath it.

Written By

Felix Ward

Felix is an indie-folk songwriter and session guitarist who values vibe over perfection. He looks for tools that potentialize 'happy accidents' and offer immediate inspiration. If a plugin requires reading a 100-page manual, he's probably already moved on.

Related Guides

All Guides →

New reviews, no noise

Occasional email when we publish something worth your time. No daily digest, no vendor press releases.

We store only your address, never sell it, and delete it as soon as you unsubscribe. See our privacy policy.